Welcome to the “How to” page for painting hopscotch using the Peaceful Playgrounds Stencil.
Painting hopscotch court
.
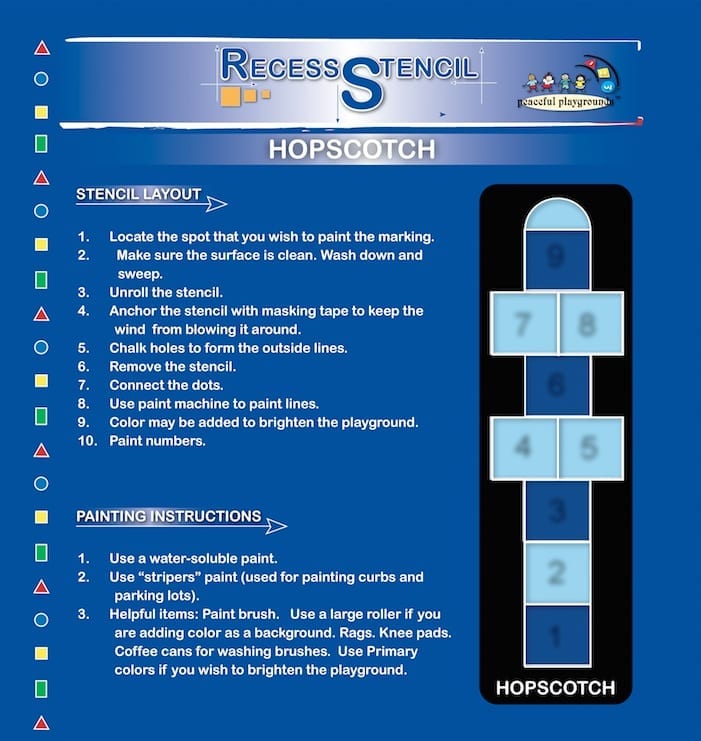
Step 1. Open the stencil packaging and unfold the stencil.

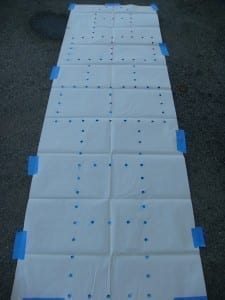
chalking the hopscotch stencil

Step 2. Anchor the stencil using painter’s tape to keep the wind from moving or tearing the stencil.
Step 3. Chalk inside the holes in order to form the hopscotch court.

Step 4. Lift the stencil and connect the dots.

Step 5. Tape over the lines using painter’s tape and outline the hopscotch court.

Adding numbers to the hopscotch stencil
Step 6. Paint inside the boxes using 2 different colors.
Step 7. Use the stencil to outline the numbers using the same steps.

8. Paint in numbers

9. You are finished. Congratulations.
Here’s how the final picture of a completed hopscotch court.

Painted hopscotch court
Prefer to watch a video? Here’s a how-to video for painting hopscotch using the Peaceful Playgrounds stencil.
[jwplayer mediaid=”9472″]